
How to Convert HEIC to JPG on iPhone Without Any Third Party Apps

Some of the best smartphone cameras are found on iPhones. iPhones are frequently seen as a substitute for a full-fledged camera because of the level of detail and accurate colour reproduction. Additionally, Apple has been enhancing the phone’s photography and editing capabilities. But because the iPhone shoots photos by default in the HEIC file format, sharing those photos on other platforms and apps can frequently be a hassle.
Occasional HEIC hiccups
Apple made High-Efficiency Image Container (HEIC) the default format in 2017 with the release of iOS 11. Better file compression without information loss is provided by the format. This simply means that, compared to the more widely used JPG format, taking and storing a shot in HEIC format would not only take up less space but won’t sacrifice information. The format can be a hassle even though this is a very useful space-saving function on iPhones, which is quite essential considering the number of photos people capture with their iPhones and the fact that iPhones do not come with expandable storage. This is due to the fact that it is occasionally quite restrictive and is not always supported.
Many government websites, blogs, and online businesses still demand that you post photographs in JPG format. If you have already taken the image in HEIC, this can be a bit troublesome (which iPhones do by default).
The just-do-not-shoot-in-HEIC option
By navigating to the Settings, you can choose JPEG over HEIC as the image format for your iPhone, albeit doing so will use up more data.
It is a rather easy process.
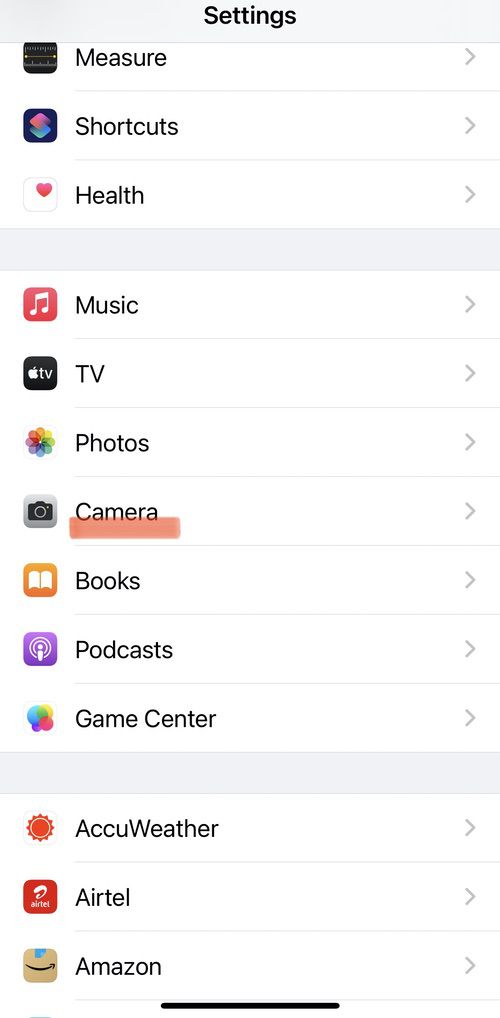
- You select Settings and then choose Camera.
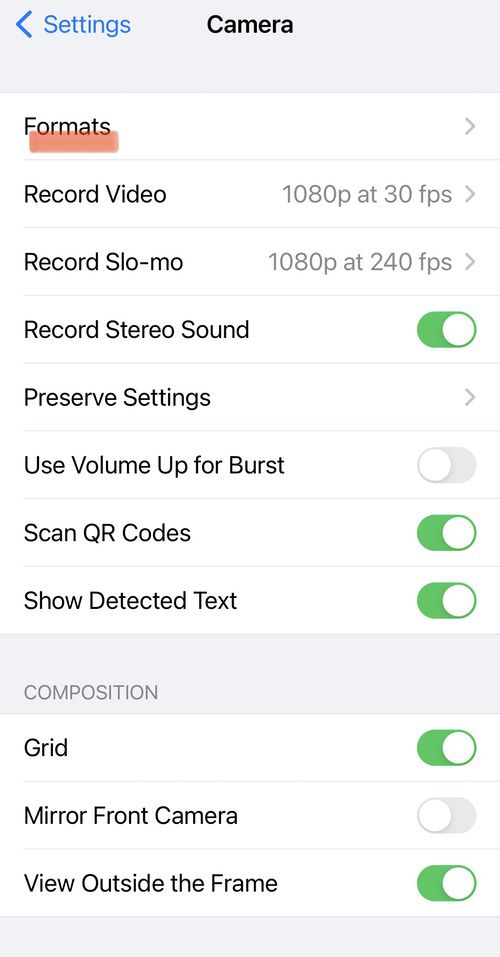
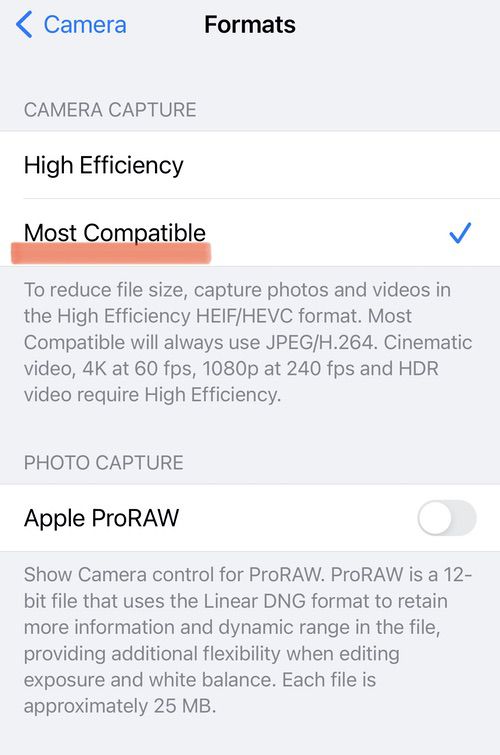
- Change the format from High Efficiency to Most Compatible by selecting Formats once there.
- Without Using Any Third-Party Apps, Convert HEIC to JPG on the iPhone
- According to their names, “High Efficiency” is HEIC, while “Most Compatible” in this context refers to JPEG/JPG.
- Without Using Any Third-Party Apps, Convert HEIC to JPG on iPhone
Convert HEIC to JPG on your iPhone itself
You can also convert a few photographs into JPEG format if you want to keep HEIC as your preferred format. You can do this by downloading third-party apps, but doing so requires that you have a second third-party software installed on your iPhone just for the purpose of converting your HEIC photographs to JPG. What if we told you that changing your image format is actually much easier than you think? one that you can use without having to download an external app. A straightforward copy-and-paste solution is already included in your iPhone.
The procedure is rather simple. All you have to do is adhere to these instructions:
Step 1: Open the Files app

You must first open the Files app on your iPhone in order to change the format of your photo from HEIC to JPEG. The iPhone has it pre-installed and it is a native app. You only need to launch Files on your phone after conducting a search for it.
Step 2: Select On My iPhone

On your iPhone, pick the Location from the Locations list after launching the Files app. You need to choose On My iPhone from this point on. Alternately, you could select iCloud Drive, but doing so can end up costing you data later on because the photographs stored there won’t be accessible offline.
Step 3: Create a new Folder

You must now create a new folder to save your photographs in after deciding on the location. You must tap on the “three-dot” menu option on your iPhone’s screen in the top right corner to accomplish this. You can select New Folder from the list there. Click the button to add a new folder. New Folder is one of the options that will appear when you long-press on any empty space in the On My iPhone window. You can give this folder whatever name you like; we chose HeicToJPEG for obvious reasons.
Step 4: Go to the Photos app

Your background research is now largely complete. The real work will now begin when you choose the photos from your Photos app and modify their format. You must now select the image or images you want to convert to JPG from your iPhone’s photo gallery in order to achieve that. Simply select the photographs you want to convert by tapping on them in the top right corner.
Step 5: Copy Photos

Once the image you want to convert is complete, hit the Share icon in the bottom left corner of the screen. Your phone will display a number of new options when you tap on it. You must pick Copy Photos from this list. Your photo will be transferred to the iPhone’s Clipboard after you choose the option. There is also a Save to Files option, but this does not alter the format of the image, so stick with Copy Photos, it should be noted.
Step 6: Go back to your Folder in Files
You must now return to the folder you just made in the Files app after copying the image you want to convert from HEIC to JPG. Simply launch the Files app, look for the folder using the search box, or go to the location where you created it. To open the folder, tap it.
Step 7: Paste photos

This conversion race’s last lap is now. You must now open the folder and hold down the long-press key while holding down the middle blank space until the option to Paste appears on your screen. Simply choose Paste, and the image will be added to this folder. The images would be saved in JPEG by default. Additionally, you have the option to edit the image names, something that is not possible in the gallery.
I’m done now. Every time you want to switch image formats, you don’t need to make a new folder. Simply paste the pictures into any already-existing folder (remember where you pasted them though). The remainder is handled by the Files app. From this folder, you may then choose, share, and upload JPEG files.
HEIC to JPG: Online solutions!

online heic to jpeg
You can also utilise a free online conversion website if you need to convert a small number of photographs quickly, have a strong Internet connection, and are in a hurry. A good choice is Cloud Convert. All you have to do is upload the images and specify the format to which you want them to be converted, and it will take care of the rest. If you have a lot of photographs to convert, though, it could become laborious.