How To Make Your Facebook Profile Private
Facebook’s default setting makes all of your information public. But what if you want to have more control over who may see your Facebook page and keep it hidden from people who aren’t your friends? Is it possible to change your account’s default settings?
Sadly, there isn’t a hidden setting that will instantly make your profile completely private. However, if you know which settings to modify, you may make your profile 100% private.
If you’ve ever wondered how to make your Facebook profile private, this article will show you how.
How to Create a Facebook Private Profile
If you want to use a browser to make your Facebook profile private, you should do the following:
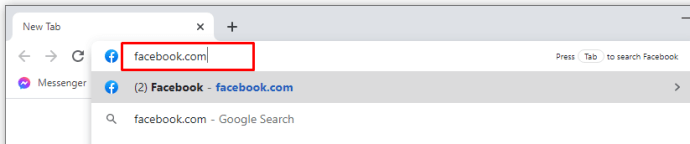
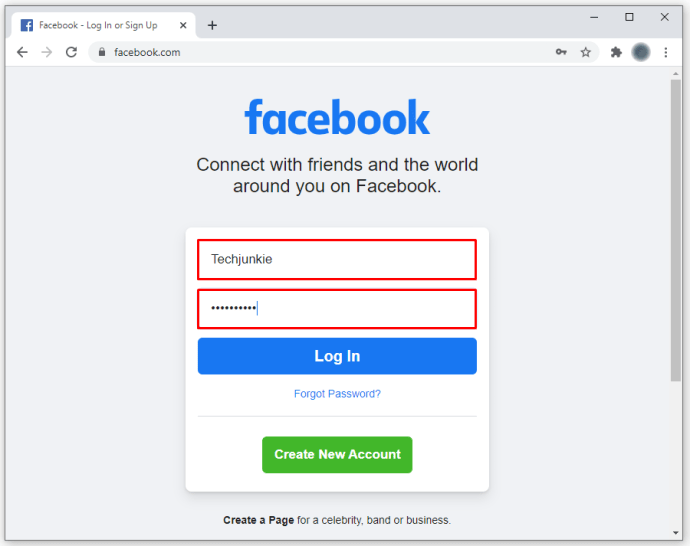
- Open any browser on your PC to go to Facebook.com.

- Sign up with your account.

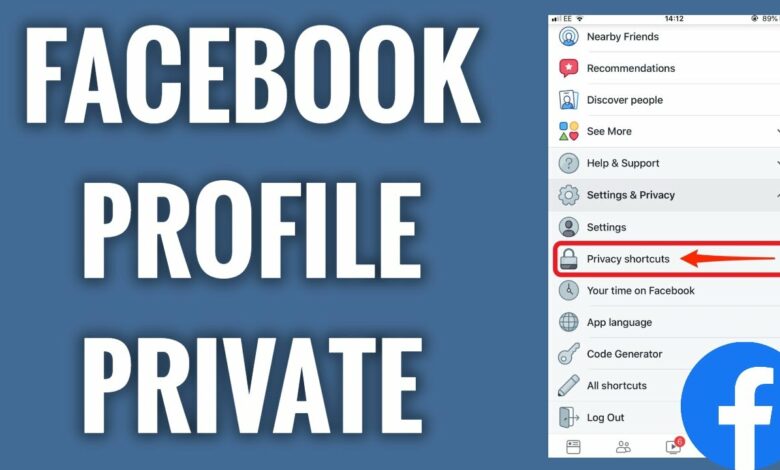
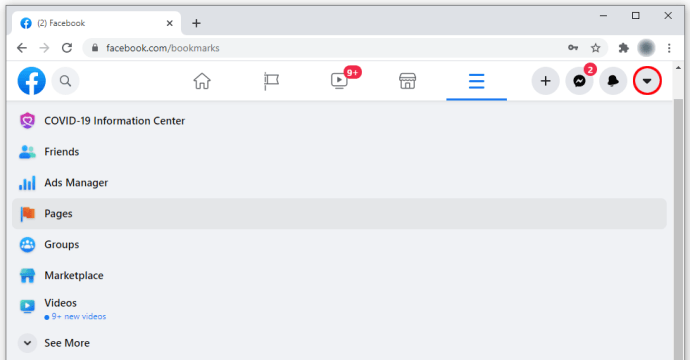
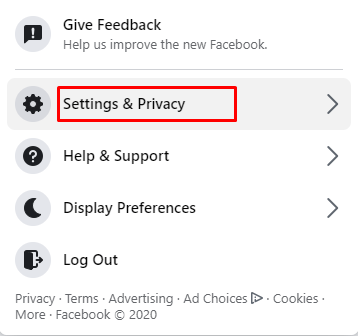
- Select the upside-down triangle labelled “Account Settings” in the top-right corner.

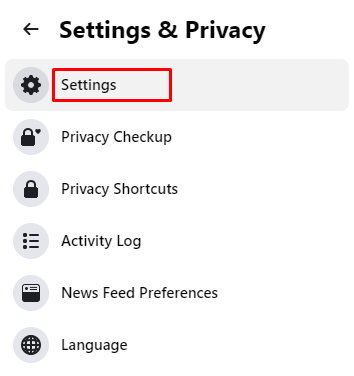
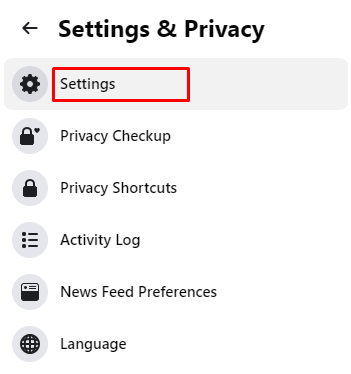
- Choose Settings.

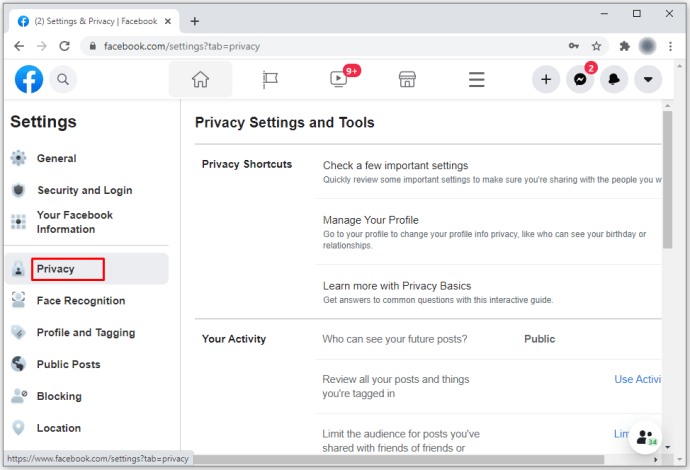
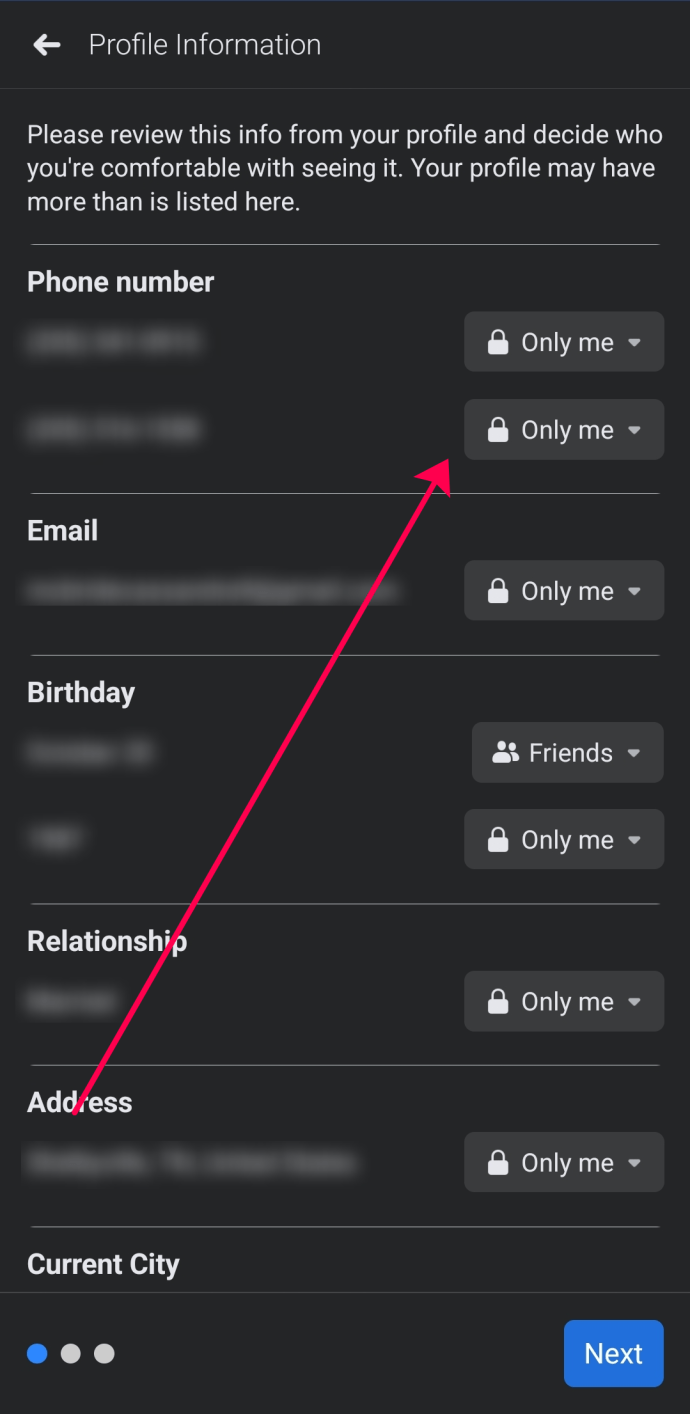
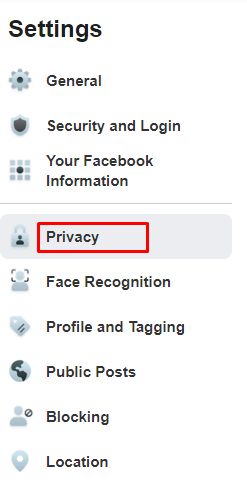
- Pick Privacy from the “Settings” menu on the left. When you do this, the Privacy Settings and Tools pane is shown on the right.

- You can now change your privacy settings for numerous features. Adapt the privacy settings to your needs. To change your privacy settings, tap anywhere in the row or the blue Edit button.


How to Make Your Profile Private On Facebook Mobile
Nowadays, a lot of individuals only use Facebook on their phones. Fortunately, those who want to make their profile private can do so with relative ease. On both Android and iPhone cellphones, most things are the same. You have two options for changing your privacy settings on the Facebook mobile app.
You can quickly check yourself by doing the following:
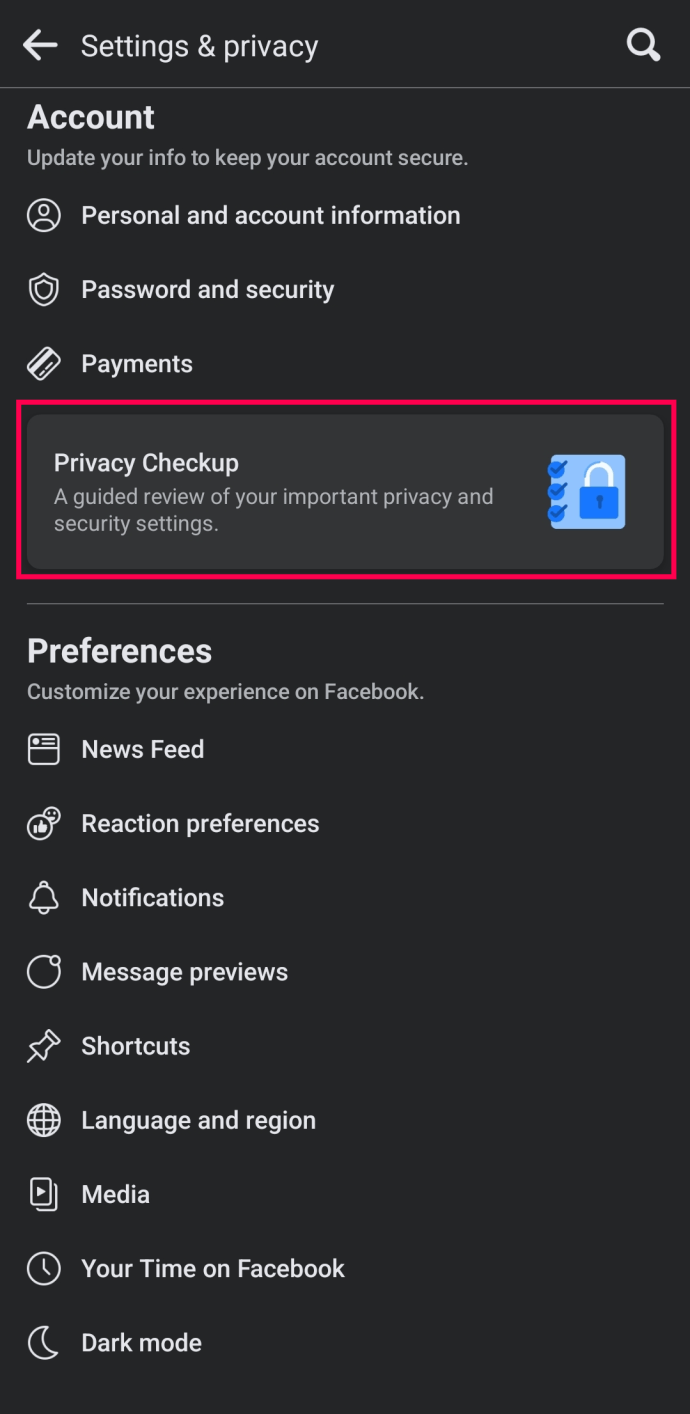
- Select Privacy Checkup from Facebook’s settings by opening them.

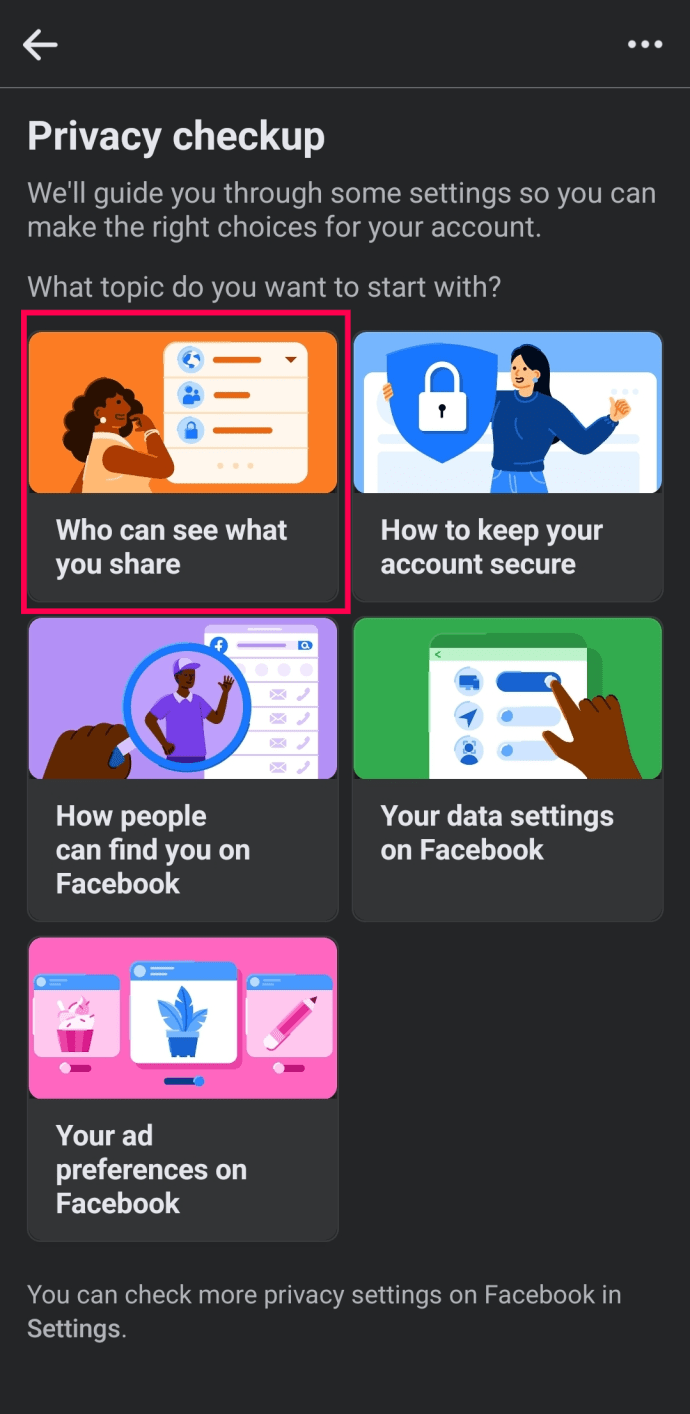
- A box in the top left corner that you should tap on indicates who can view what you share.
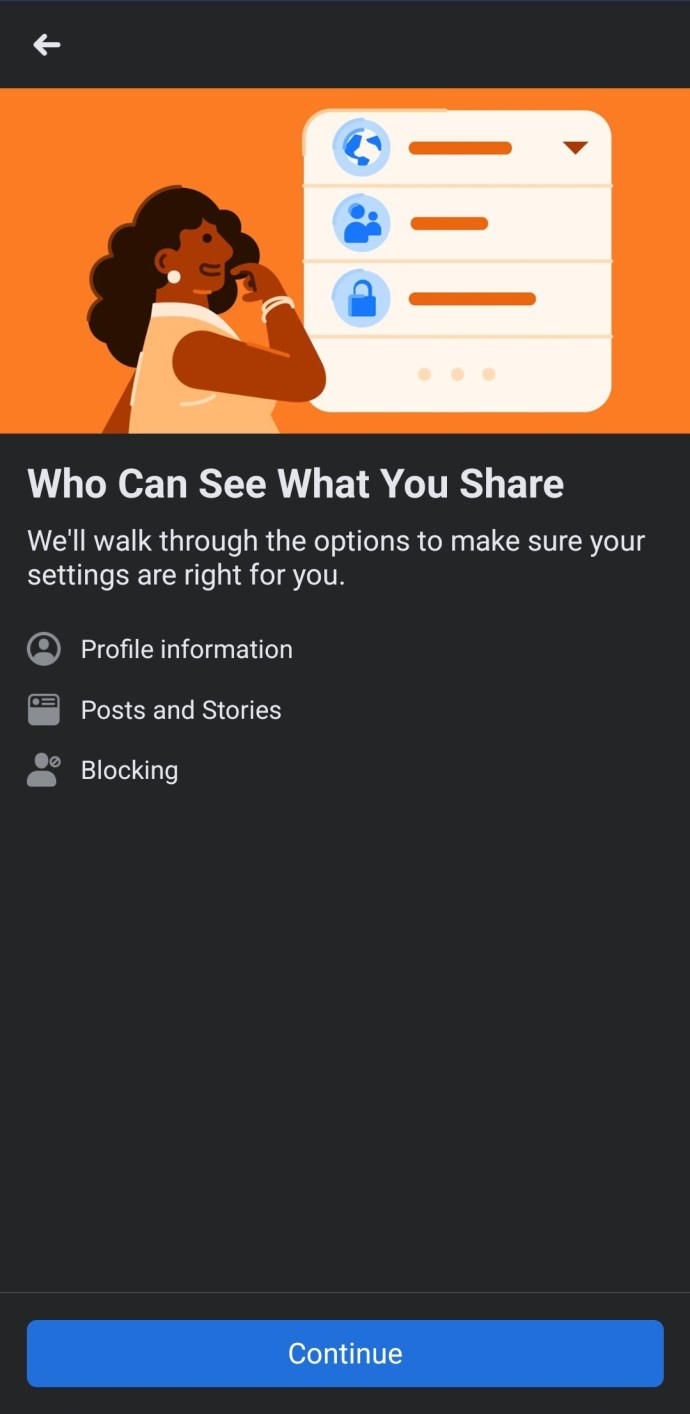
- Choose Continue.
- By tapping the dropdown menu to the right, choose the privacy level that most closely matches your requirements. To proceed, tap Next at the bottom.
- Click the dropdown menu to the right to specify who can view the content you upload.
- Note: Select Limit to change the privacy preferences for earlier entries.
Blocking other users is your final resort.
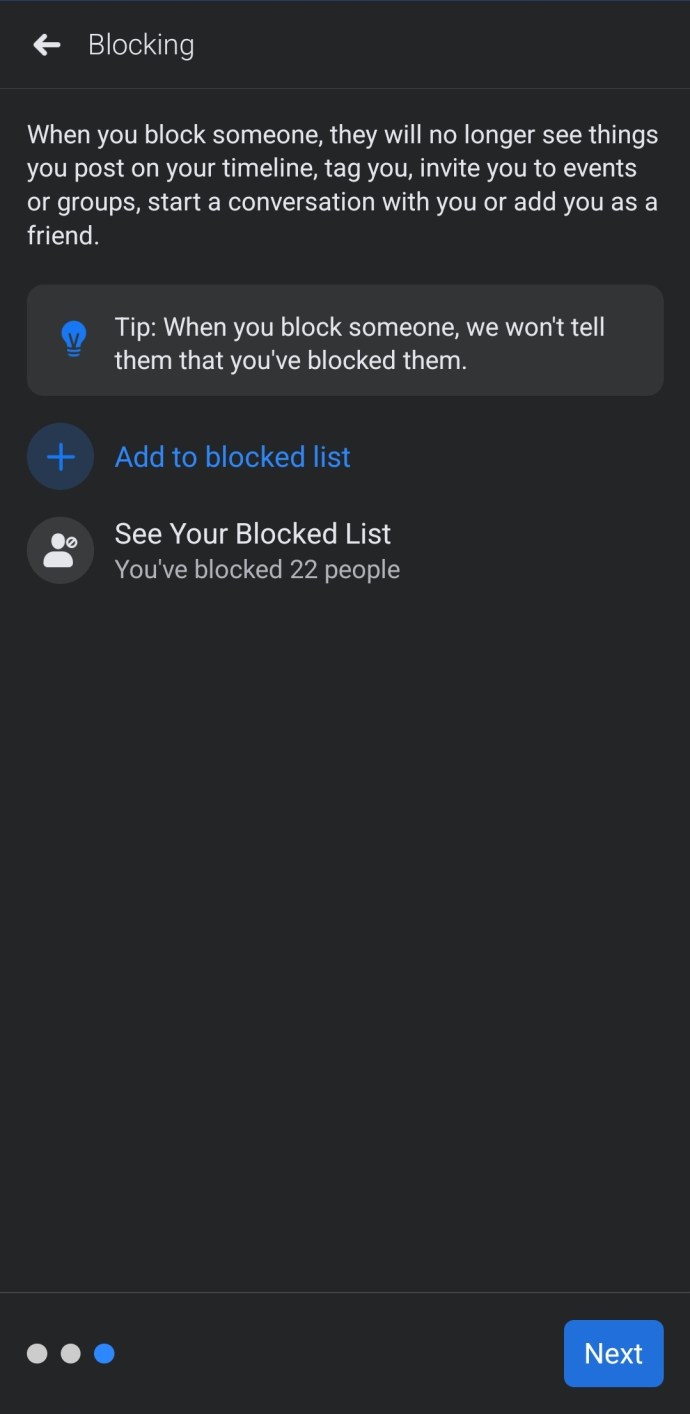
By navigating to the Privacy Checkup settings, it is simple to restrict what other people can see. To make extra information private, you can do the following things if you’d prefer to have more options:
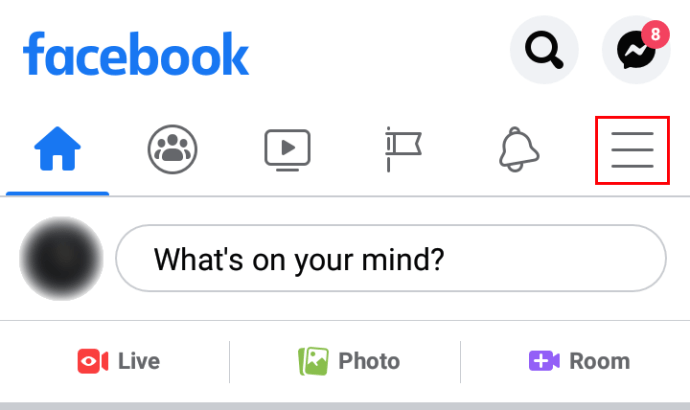
- Open the Facebook app on your phone.

- Toggle the hamburger icon on and off. Depending on the phone, it will either be on the bottom right or top right of the screen.

- Scroll down to select Settings and Privacy.

- Tap on the Settings tab.

- To make the necessary adjustments, click on the various options under the “Audience and visibility” section.
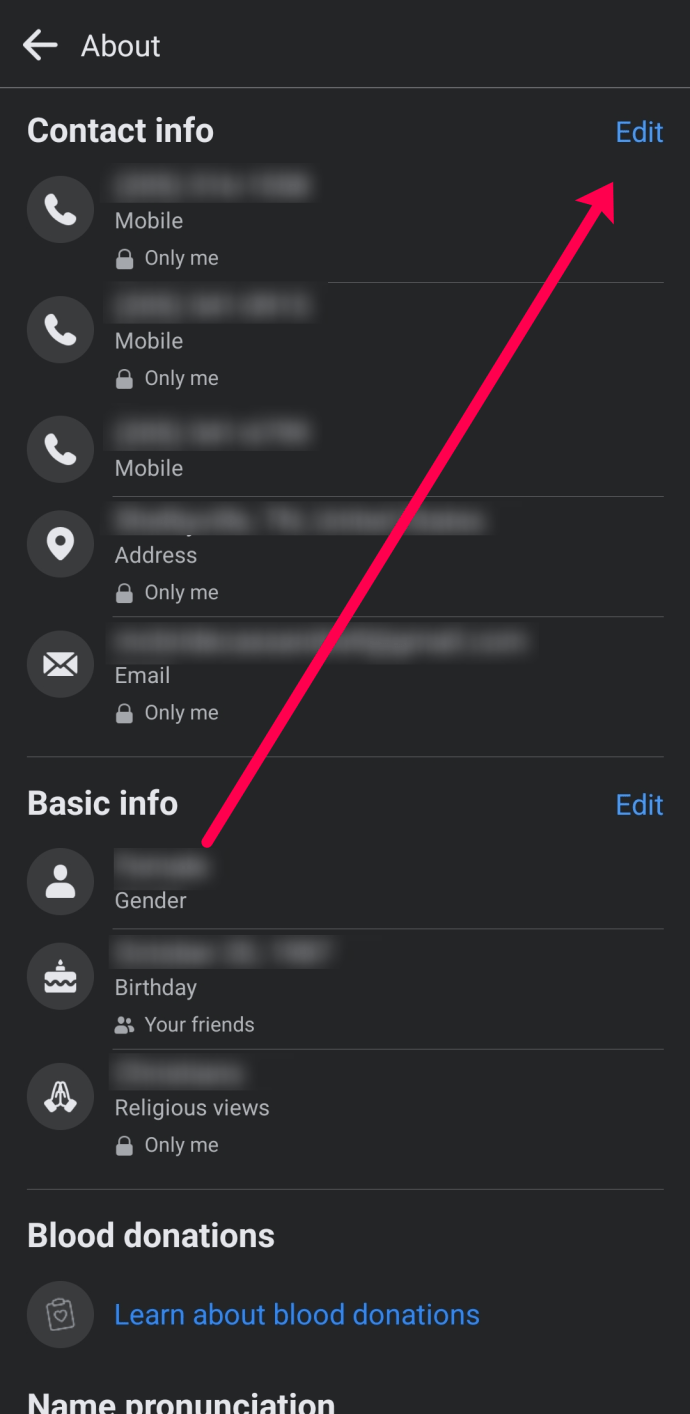
- If you click Edit to the right of your contact information, you can decide what other people see.
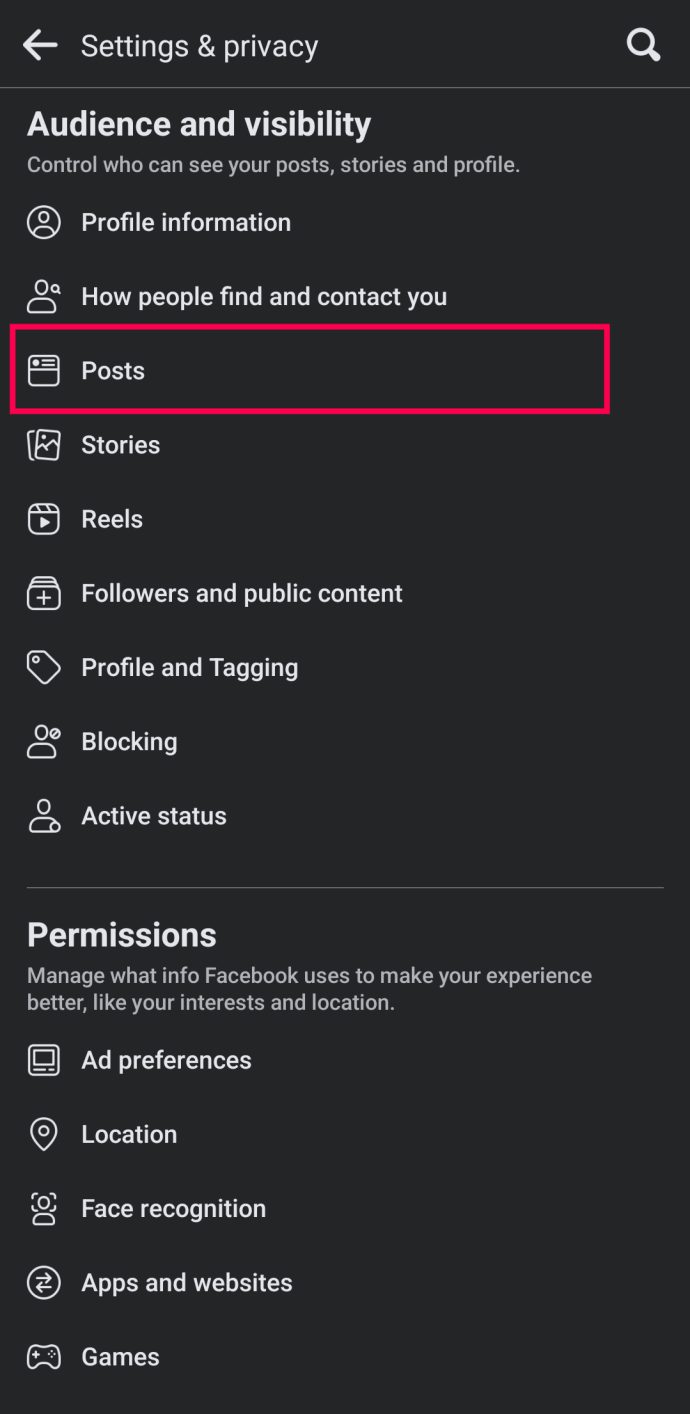
- To make your postings private, tap on Posts.
- Navigate the remaining options by pressing to make your selections.


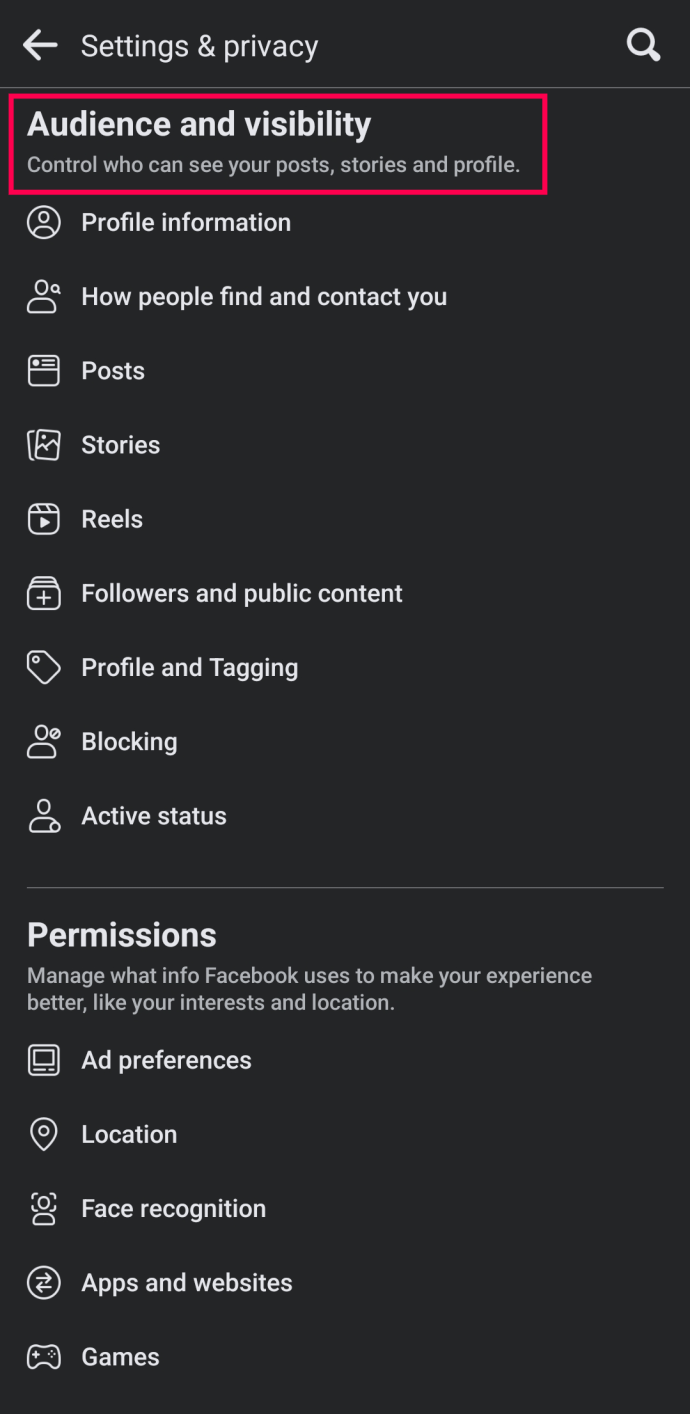
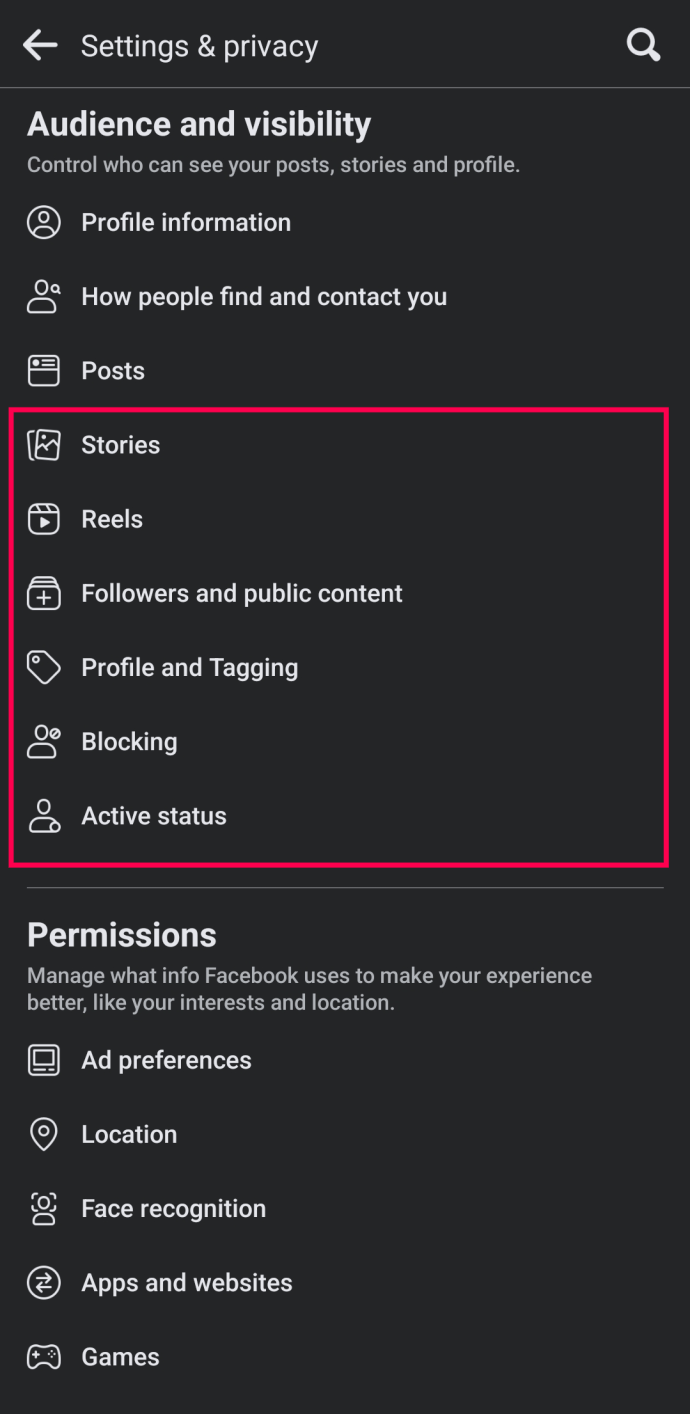
By following these guidelines, you can make items other than your posts and contact information private. By using the Followers and public content option, for instance, you can limit who can leave comments on your public postings.
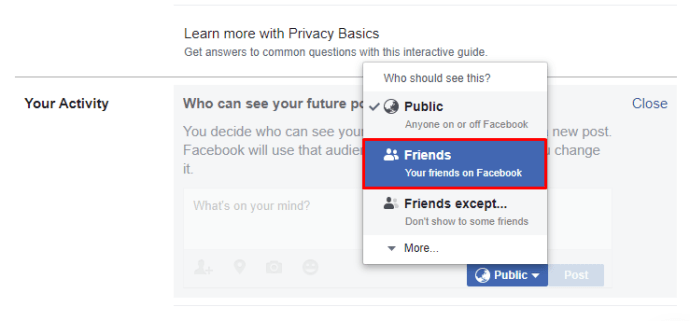
How to Make Future Plans Private Facebook Profile and Private Facebook Content
What if you want to prevent people who aren’t your friends from seeing the information on your Facebook profile? How come you can’t do this? The actions are detailed below.
- Access Facebook.com using any browser, and then log in to your account.
- You can tap or click on the upside-down triangle (account settings) in the top right corner of the screen.

- Tap or click on Settings and Privacy.

- Choose Settings.

- Select the Privacy area from the left menu.

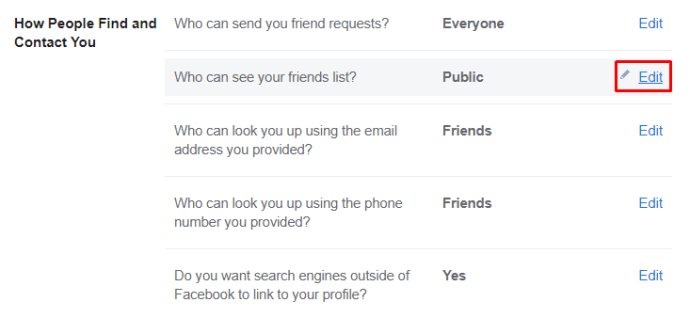
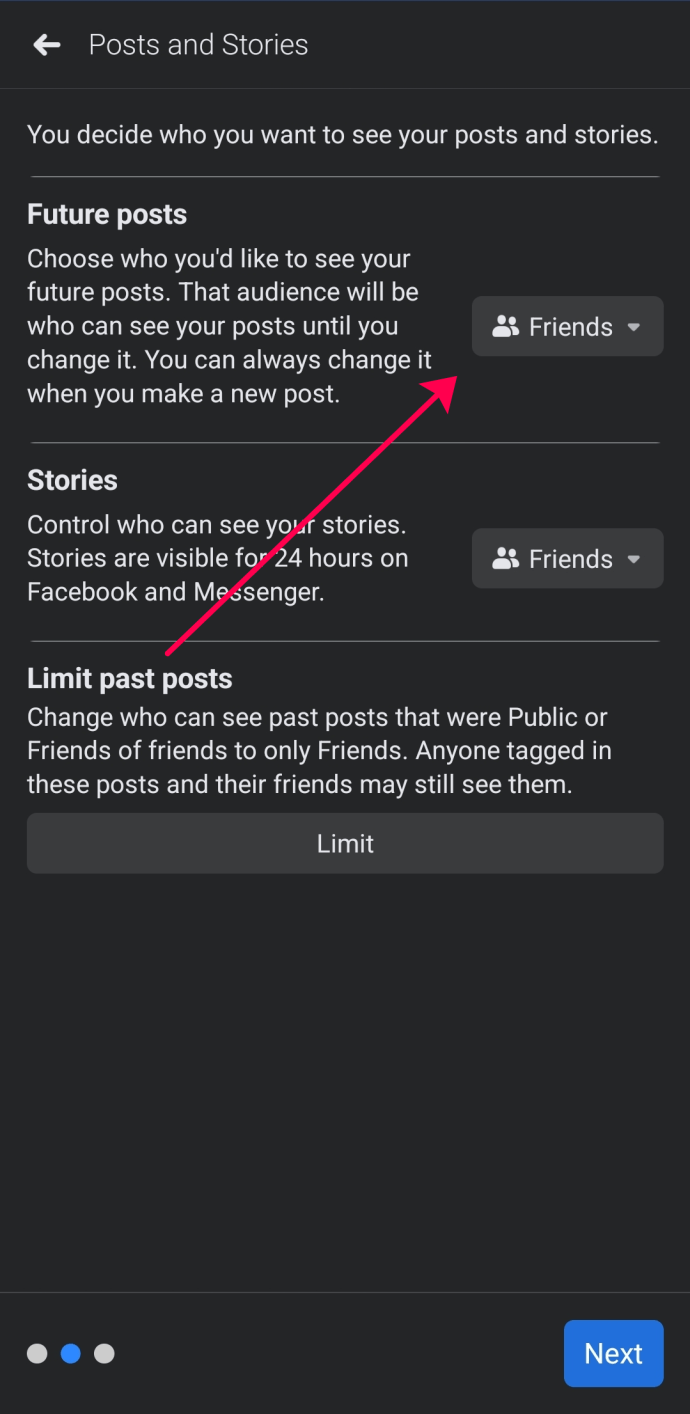
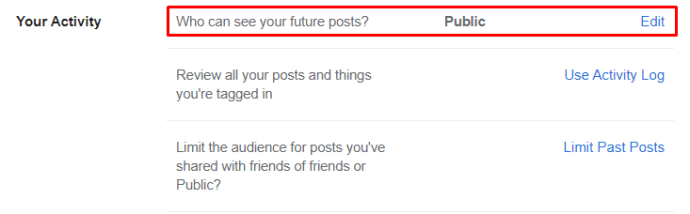
- Then, touch or click the Edit button (or any other spot in the row) for Who can access your future posts. Scroll down to Your Activity in the right pane.

- By clicking or tapping on Public, you can change Friends to Public.
You may change this setting by tapping the three dots in the upper-right corner of each of your posts (of that post). You control who can access your status here (public, friends only, private, custom, etc.).
In conclusion, concealing your Facebook page is quite simple, but achieving anonymity takes more than a single click. All the choices are located in the “Settings” menu’s “Security and Privacy” section. Problems won’t emerge if you simply follow the guidelines in this article.
Face book privacy FAQs
Here, more of your questions regarding Facebook privacy are answered.
If I have my profile set to Private, can people still view my profile photo?
The answer is that even those without Facebook accounts can see your profile picture (search engine results, profile URL, etc.). When you set your profile to private, other users can still view your profile photo and a few account-related data, but they can only read posts you made that are tagged as “Public.”
How can I find out how people who aren’t my friends see my profile?
One of Facebook’s useful features is the opportunity to see how other people’s profiles appear. This tool is quite helpful for checking what information you have marked as “Public,” such as posts and “Friends” lists. Follow these steps to view your profile as it would appear to the general public:
1. Open Facebook, then press the arrow in the upper right corner.
2. Click the hamburger button, which may be found in the top right (Android) or bottom right (iOS) of the screen (iPhone).
3. Go to the page for your profile.
4. On your profile page, click the Edit Profile link next to the three horizontal dots.
5. Squeeze or click View As.
Can I make my profile photo private?
Unfortunately, you cannot make your profile photograph private. The image you upload to serve as your profile image is public. However, you can switch your profile picture to the default Facebook image (the silhouette of a person on a blank background). Go to your “Profile Picture photo album,” select your current profile picture, then click the three dots to erase the image.
For your profile photo, you can also select a more general image, such as a picture of your favourite superhero or logo. Laws pertaining to copyright infringement should be considered.