
Performing a factory reset on any of your technological equipment is sometimes advised as a fix for a variety of potential problems. This activity can be carried out to improve performance and return your MacBook Air to its former splendour.
A factory reset will make sure that all of your private and personal information is erased from your MacBook Air if you decide to sell it to someone else. In order to maintain good seller ratings and avoid the inconvenience of having to erase your information after the transaction is through, be sure that someone else can log in and start using your old MacBook Air.
Your computer will feel as though you just took it out of the box by executing a factory reset after making a Time Machine backup and backing up your MacBook Air.
Now that macOS Mojave is out, now is the ideal moment to update your computer once more. Your Air will continue to function properly for many years to come thanks to the numerous new improvements and system modifications in Mojave. However, keep in mind that only MacBook Airs produced after mid-2012 are compatible with macOS Mojave.
To make sure that all of your data is backed up and the reset is done correctly if you’re not familiar with how to perform a factory reset on your MacBook Air, follow the steps listed below.
Data Backup Using the Time Machine
On a MacBook Air, Apple makes data backup quite simple. You can back up all of your files, programmes, and other crucial data with Time Machine and an external hard drive.
It’s a fantastic opportunity to purchase an external hard drive if you don’t already have one. Built exclusively for Time Machine backups, Apple offers the AirPort Time Capsule.
In addition, there are many 1 and 2 terabyte drives on Amazon for under $100. If you’re looking for a recommendation, look at the Western Digital MyPassport drive or the Seagate Backup Plus , both of which are built to function with macOS right out of the box.
- Connect your external drive to your computer, then launch Time Machine on your Mac (this is accessible either through Launchpad or in System Preferences).
- Pick your external hard drive by clicking Select Backup Disk.
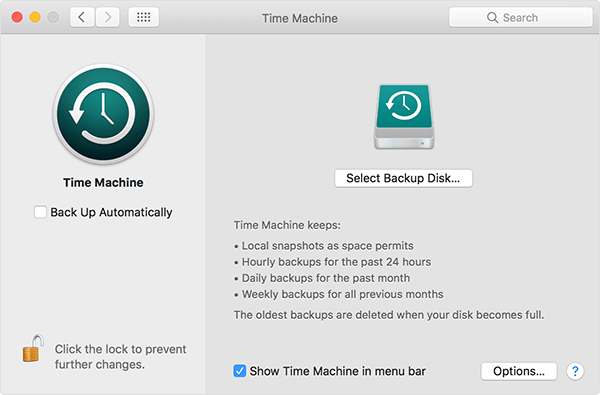
3. Your hard drive will act as a time machine backup drive if you choose to use the disc.
4. From the Time Machine menu, select Back Up Now.
5. Press the Options button in System Preferences under the Time Machine menu to manage what is and isn’t being backed up (If this is your first time doing a Time Machine backup, it may take a while).
Once your backup is complete, please sure to carefully remove the drive from your MacBook Air before unplugging it.
Open Finder and tap on the name of the drive to properly eject your external hard drive. Select the “Eject” button (an arrow with a line underneath). If your MacBook won’t let you do this, your external hard disc is probably still being used by another software or the backup isn’t complete.
Your MacBook Air’s Factory Reset
It’s time to factory reset your MacBook Air once you’ve backed up your user data to Time Machine or the backup software of your choice. You can use this procedure to fix the majority of defects and issues with your MacBook, such as slowdowns and frozen applications.
Resetting your computer will usually increase its speed to the level it was in when you initially received it. To completely erase any user data still present on your MacBook Air before selling it, you must do a factory reset.
Redownloading MacOS from inside the boot display on your computer will enable you to wipe and reinstall the operating system using the built-in recovery disc utility.
As an alternative, you can decide to download macOS Mojave to your device from the Mac App Store and turn the downloaded file into a bootable USB drive. You may find instructions for that here. But for the time being, we’ll focus on how to restart your MacBook Air from the device’s boot screen. Please be aware that a working internet connection is necessary for this.
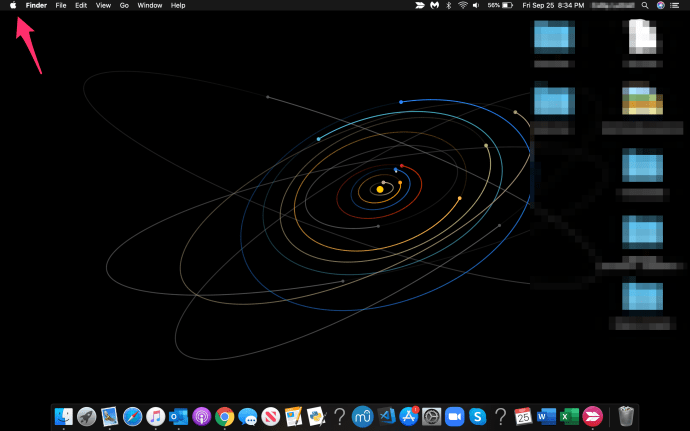
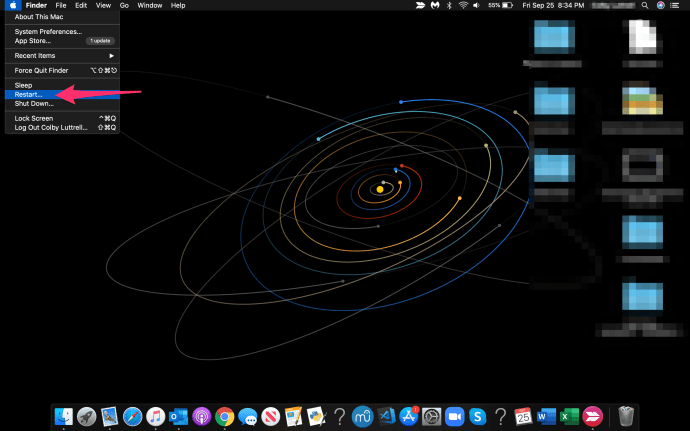
- On your MacBook, click the Apple icon in the upper-left corner of the screen.

- Select Restart from the drop-down box, then get your keyboard ready to start typing.
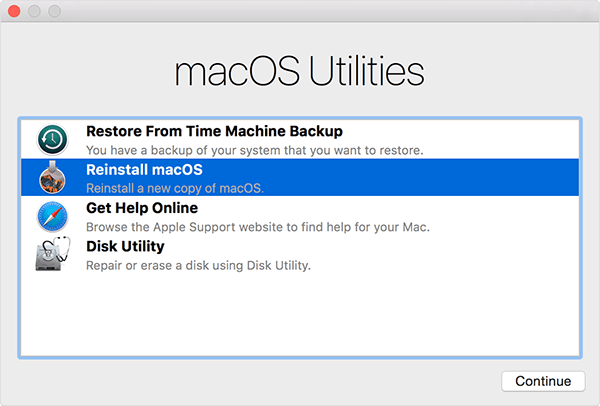
3. Press and hold down Command + R on your keyboard until the Apple logo reappears on your MacBook Air’s display. Hold on to the mouse until the macOS Utilities window appears on the screen.
Click Reinstall macOS to reinstall macOS over your current file system.
4. However, click Disk Utility at the bottom of the list to factory reset your device.
5. Locate and pick your MacBook Air’s Startup Disk on the left side of Disk Utility when it has launched. This is the primary and only disc listed for the majority of users.
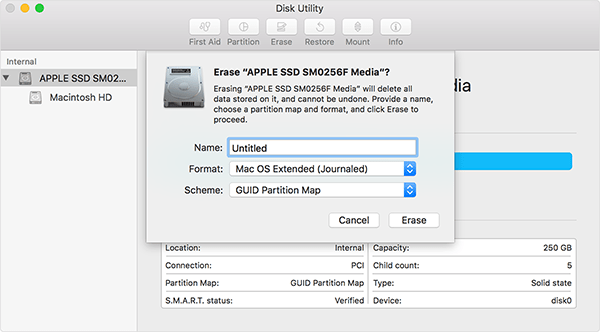
6. Inside of Disk Utility, click the Erase button.
7. Choose Mac OS Extended from the Format pop-up window.
8. You can confirm your erasure by clicking Erase after giving your reformatted disc a name.
A display will now start to delete the drive and data on your MacBook Air. Your disc will be successfully wiped when this process is finished, but you are not finished yet.
No matter if you’re selling your laptop or merely reformatting the drive to increase speed or efficiency, you’ll still need to reinstall your operating system because it’s no longer loaded on your computer.
How to Reinstall macOS on a MacBook Air
- Start by exiting Disk Utility on your recently reset MacBook Air by choosing Disk Utility, then Quit.
2. To reinstall the most recent version of macOS, choose Reinstall macOS from the list of macOS Utilities and follow the on-screen instructions.
3. Select the default drive when prompted to select the disc you wish to install because most MacBook Air models only come with one storage drive unless you add another one yourself.
4. Your computer will start downloading macOS when you click Install, following which you might be prompted to grant some rights. It will take some time for this download to complete, especially if your internet connection is sluggish. Wait patiently for the reinstall to finish. Be cautious to give yourself enough time to reset the system and resume working because this could take many hours.
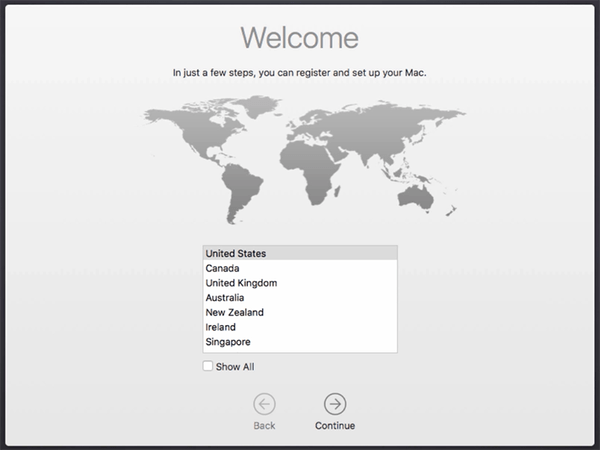
5. You might need to manually begin the installation of macOS after the download is complete by agreeing to the installation on your machine. The macOS Welcome page will immediately boot up after your laptop has finished installing your operating system, asking you to create a new account and set up your system.
You may essentially turn off your laptop here if you intend to sell it; your MacBook Air has been reset to factory settings and is secure to ship and is prepared for a new user. Additionally, this stops the buyer from having access to any of your private or sensitive information.
Putting a Time Machine Backup Back Up
You’ll need to use a Time Machine backup to recover the files you saved to your external hard disc once you’ve completed configuring your reformatted Mac. Restoring from any of the saved backups on your device is simple with Time Machine; this includes carrying out this procedure on newly formatted machines. This is the procedure.
- Start by launching Time Machine from your dock or, if you’ve deleted the shortcut from your dock, from the menu bar at the top of your screen by clicking the Apple icon, choosing System Preferences, and then choosing Time Machine.
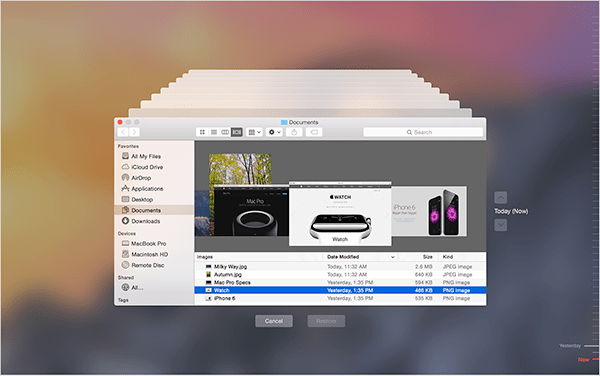
- You may use Time Machine to search through your files and discover the ones you want to recover while your external hard drive is connected to your MacBook Air. You can go through the list of backups on your MacBook’s display and choose the right or most recent one to restore from by using the timeline on the right side of the screen, which displays the date and time of each backup.
Press the restore button after choosing the file or files to return them to your device. Select the desired file, then press the spacebar key on your keyboard to view it.
Alternately, if you wish to format and reinstall macOS and restore everything from your Time Machine backup, you can do so by using the same method described earlier in this book.
- When you see the Apple logo, just press Restart on your device, wait for your computer to restart, and then press Command + R on your keyboard.
- Select Restore from Disk Utility and then follow the on-screen steps to restore your backed-up software and files to your computer once you’re back in the macOS Utilities display.
Errors During Restoration
Even while you won’t want to do this frequently, it’s amazing how a straightforward reinstall can restore the freshness of your old Mac. Reset your MacBook Air once every two years to keep it operating efficiently.
Contact Apple Support if you experience any problems with Restoral. No Bag Entry errors have been reported by some customers who attempted to restore outdated software. If this occurs, your MacBook Air is unable to reinstall macOS because it is experiencing problems connecting to the App Store.
Verify that your MacBook Air is linked to a reliable wifi provider. Users have noted that your MacBook won’t be able to complete the restoral using public wifi.
Factory Resets
Regardless of whether you want to sell your old laptop, trade in your old MacBook for a new one, or restore your computer to its previous functionality. How to factory reset your MacBook Air is now known to you.
Below, please share your opinions and experiences with factory resetting MacBooks.